It could be challenging if your laundry room is small since there won’t be much space for other items. If that sounds like you, installing a wooden countertop on your washing machine can help resolve this problem.
But how do you get started? What are the tools and materials you need? This is where this DIY post comes in!
This informative article will demonstrate how to accurately measure, cut, and install a hardwood countertop over your washing machine.
With the right tools and some basic knowledge, you can quickly and easily construct a solid, gorgeous, and usable wood countertop.
Let’s get started!
Narrow washing machines: Everything You need to know
Manufacturers design narrow washing machines to fit in small spaces, making them a great option for people who live in apartments, small houses, or have limited laundry room space. They typically have a width of 24 inches or less- about half the size of a standard washing machine. Some narrow washing machines have a small capacity, usually around 1.5 to 2.5 cubic feet, which is suitable for washing a few items at a time. However, there are also larger narrow washing machines with capacities of up to 3.5 cubic feet, which can handle larger loads of laundry. See some of the best narrow washing machines here. These machines may not have all the features of a full-size machine, such as a steam cycle or extra wash options, but they can still effectively clean and care for your clothes. Remember, it is always best to read reviews and compare features to find the best narrow washing machine for your needs.
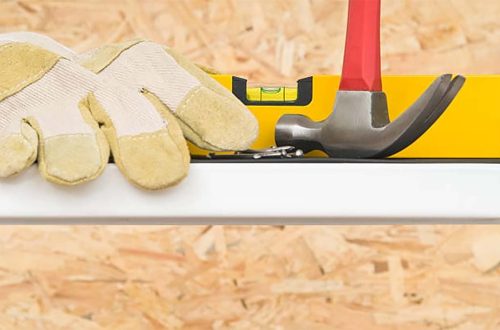
How to make a wood countertop for a narrow washing machine
You’ll need these materials and tools for your DIY countertop:
Materials
- Glue
- Wood screws
- Wood or MDF board
- Wood finish
- Sandpaper for the edges
Tools
- Sanding block or electric sander
- Measuring tape
- Pencil for marking
- Circular saw, or hand saw
- Screwdriver
- Paintbrush or roller (optional)
Instructions
Follow these steps to finish the project:
Step 1: Prepare the board for installation
Preparing the board before starting to make your own narrow washing machine countertop is necessary. You’d want to ensure the lines are straight and the board is cut to the exact size of the area you are covering.
Use a sander to smooth off any sharp edges and corners. Applying an oil-based primer to the board can aid adhesion when you begin adding further layers, such as paint or polyurethane sealer.
Check the board one last time to see if any imperfections need fixing. After taking care of these preparation processes, you can begin constructing your DIY countertop!
Step 2: Install a wooden cleat or ledge for the board
Installing a cleat for the board is the next step when making a countertop for a narrow washing machine. For this, you’ll need to attach a long 2 “x4” piece of lumber to the wall behind and just above the washer. You will also need to match up and attach shorter pieces of 2x4s at intervals along their length so that your board can be securely held in place. For further assurance, use screws instead of nails, and make sure they are sunk deep into the wood before you move on with your project. With your cleat or ledge in place, you now have an excellent platform to place the finished countertop and get ready to do laundry in style!
Step 3: Place the board on the cleat
Finally, install the board onto this cleat. You’d want to ensure it fits securely before weighing down any items. These may include your laundry detergent or fabric softener. Following these simple steps will see you enjoying your fully functional countertop in no time!
More space-saving tips for your laundry room
Are you still looking for more ways to save space in your laundry room? Here are some helpful tips to get you started:
Consider installing wall cabinets above your washer and dryer for extra storage. Another helpful solution is shelving; to keep things organized, group the shelves into groups like “cleaning supplies,” “detergents,” and “fabric softeners.”
Choose from a variety of sizes and designs of baskets to meet all your laundry needs. Baskets are particularly useful since they can serve as both storage containers and decorative items.
Furthermore, a hanging drying rack can allow greater flexibility in drying big objects without taking up floor space if it isn’t too difficult to install and move about as required. In order to avoid having to worry about an item taking up counter or floor space while not in use, consider placing an iron holder or folding bar on the wall behind the door.
Conclusion
There you have it- simple DIY steps to making the perfect countertop for your narrow washing machine.
As you can see, adding a wood countertop to your narrow washing machine can be a simple DIY project that can help to expand your laundry room’s storage and workstation. As mentioned in this post, there are several other space-saving tips to consider.
With these suggestions, you’ll soon be well on your way to having a tidy and effective laundry room!